Minecraft is a game where a player’s creativity is explored. With unlimited creation options, players can also choose and customize their skin. Minecraft skins are mainly focused on customizing the protagonist’s appearance. Whether you want your favourite Minecraft creator’s skins or fictional character-themed ones, you can get it all in Minecraft. You’ll need Minecraft resources or texture packs to change other characters’ skins and get these amazing skins.
If you don’t know how to download Minecraft skins, we’ll guide you through the process. Along with downloading, we’ll teach you how to make your own skin in Minecraft. Make sure you have a working version of Minecraft and find a suitable skin for your character.
How to download Minecraft Skins
When it comes to downloading Minecraft skins, there are several sites and communities, but Minecraft Skindex is one of the most popular ones. To download skins from Minecraft Skindex, follow the steps below.
Step 1: Visit the homepage of Minecraft Skindex and choose a skin that you prefer.
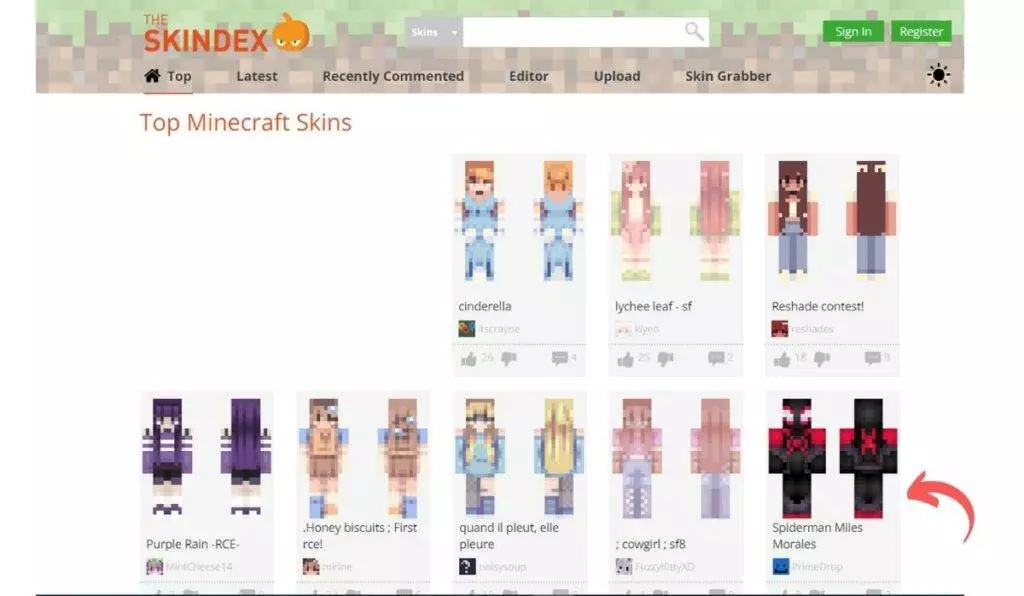
Step 2: Once you pick a skin, a new page with various export options will appear.
Step 3: Click on the “Download” button on the screen’s right-hand side.
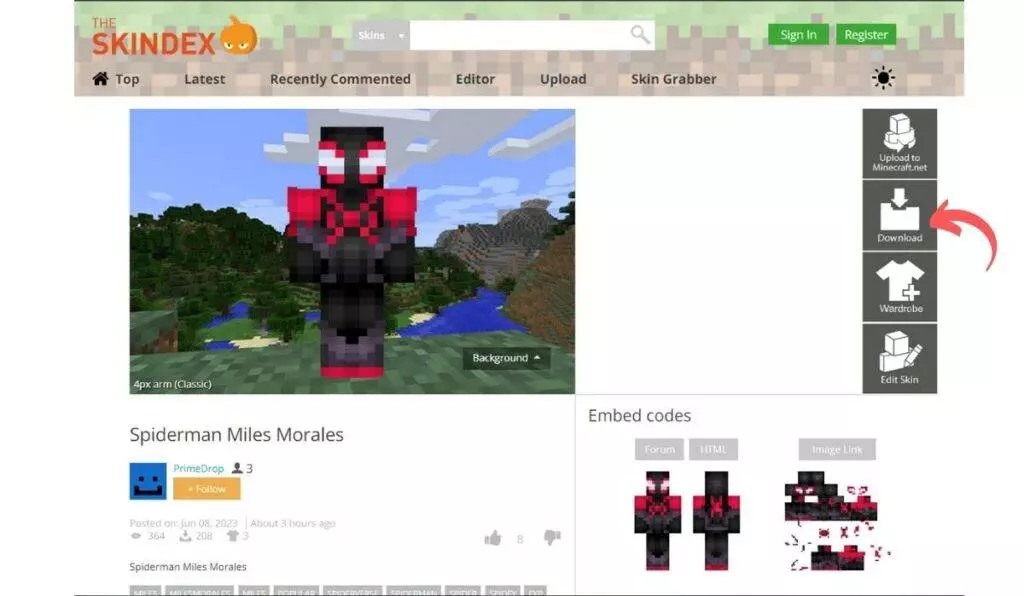
Step 4: This action will download a PNG file of the skin to your computer. You can find it in your Downloads folder.
Note: The PNG file may have low-quality graphics.
Now, you can download a skin from the home page or use the search option to find a specific character or theme.
How to Install Skins on Minecraft Bedrock Edition
The Bedrock Edition has an in-built skin builder where you can build your own skin. You can also import skins and purchase them inside the game. To install skins on Minecraft: Bedrock Edition.
Step 1: Launch Minecraft on your device and navigate to the home screen.
Step 2: Click on the “Profile” button below your character on the right side of the screen.
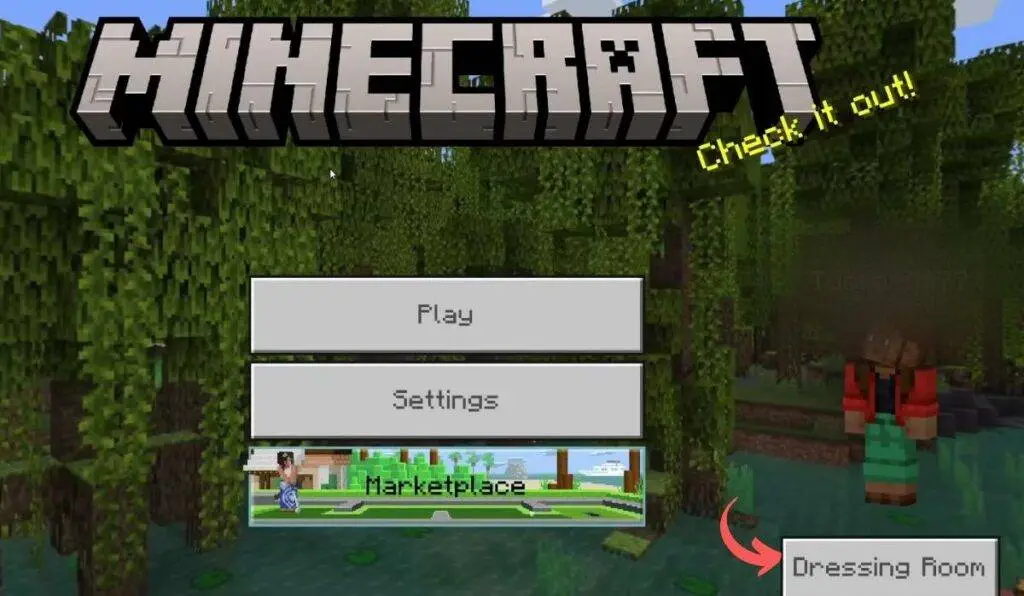
Step 3: You will be directed to the character selection screen to choose the character you wish to customize with the new skin.
Step 4: Click on the “Edit Character” option. You will find several tabs on the top left corner of the screen.
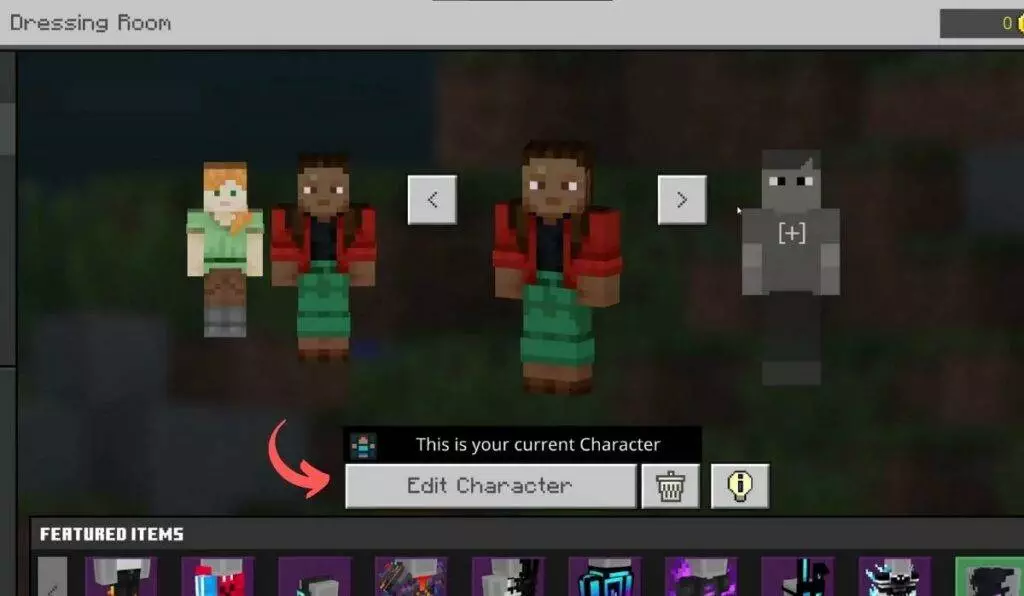
Step 5: Move to the second tab to access your personal skin options. Under the “Owned” section, select “Import” and then click on “Choose New Skin.”
Step 6: A new window will open up, showing your Windows Explorer. Browse through your Downloads folder to locate the PNG skin file you downloaded.
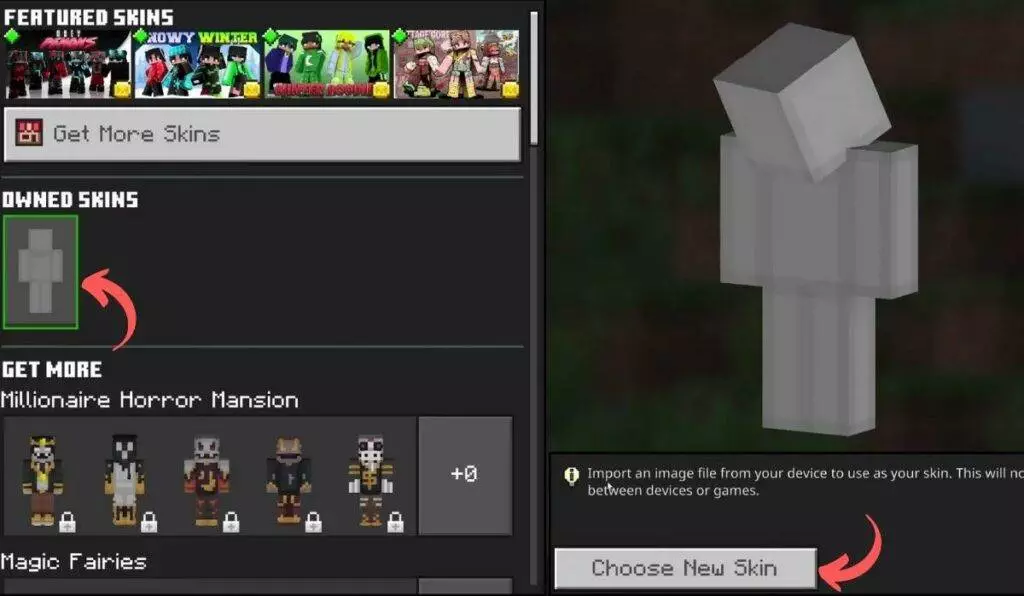
Step 7: After selecting it, click on “Open” to import the skin into the game.
Step 8: Select either the classic or slim model type, based on your preference.
Once you have selected, the skin will be applied to your character in Minecraft, and you are now ready to play the game with the customized character.
How to change your skin on Minecraft Java Edition
Changing skins on Java Edition is relatively easy compared to the Bedrock version. To change your Skin in Minecraft Java Edition, follow the steps below:
Step 1: Visit the official Minecraft website and log in with your Microsoft or Mojang account.
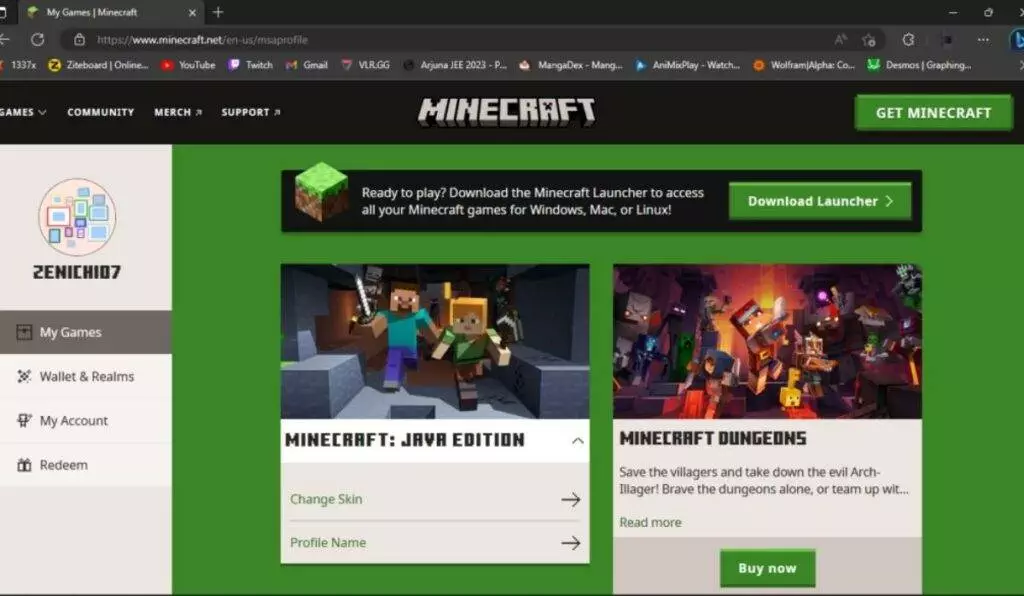
Step 2: After Logging in, locate the “Skin” option on the left-hand menu and click on it. This will take you to the skin uploading section, where you can choose your character version as Slim or Classic and upload the downloaded skin.
Step 3: Once you’ve uploaded the skin, open Minecraft.
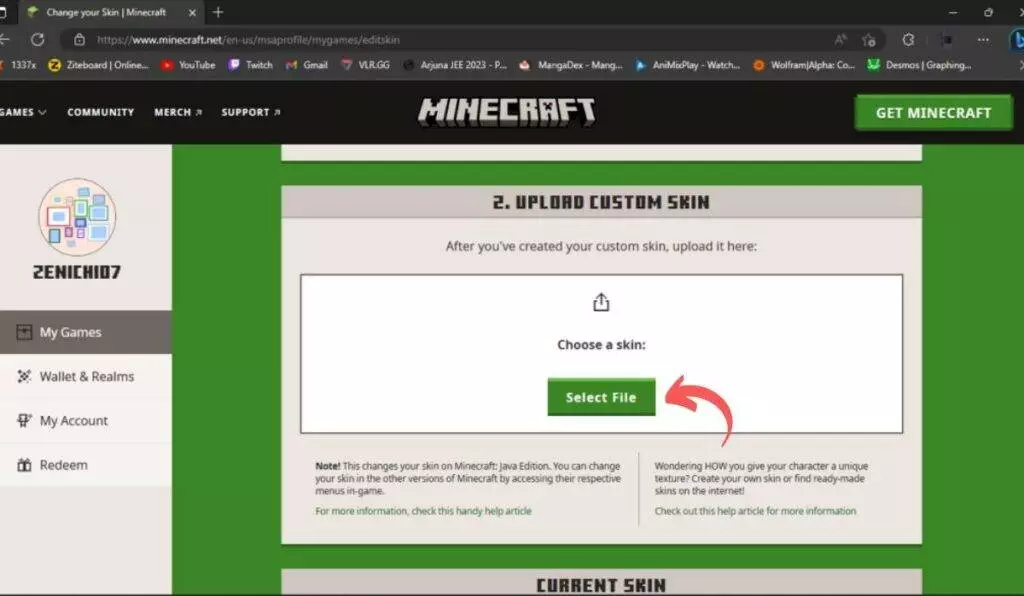
Step 4: If the skin is uploaded successfully, you will be able to see it on your character the next time you start Minecraft.
How to Install Skins on Minecraft Pocket Edition
Changing or adding skins in Minecraft Pocket Edition (PE) is similar to the process for Minecraft Bedrock Edition. So, you can use the above Bedrock Edition steps to install skins on Minecraft PE.
The only difference is that a clothes hanger icon in the Pocket Edition replaces the “Profile” button on the home screen.
How to make your own Skin in Minecraft
So, you can create your own Minecraft skins in two ways. If you want more freedom and customization options, you can use photo editing software like Photoshop or any other software to edit the default skin.
Note: Make sure to save it as a transparent PNG in the same size as the original skin.
But if you’re not too fussed about going too in-depth, you can use Skindex’s online Minecraft Skin Editor. It’s easy to use and lets you create a custom skin without any fancy software.
To make your own skin in Minecraft through Skindex, follow the steps below:
Step 1: To create a Minecraft skin, click the “Edit Skin” button on Skindex or press the Editor tab on top.
Step 2: Use the Skin Editor to create your skin by filling the boxes with the brush and colouring tool.
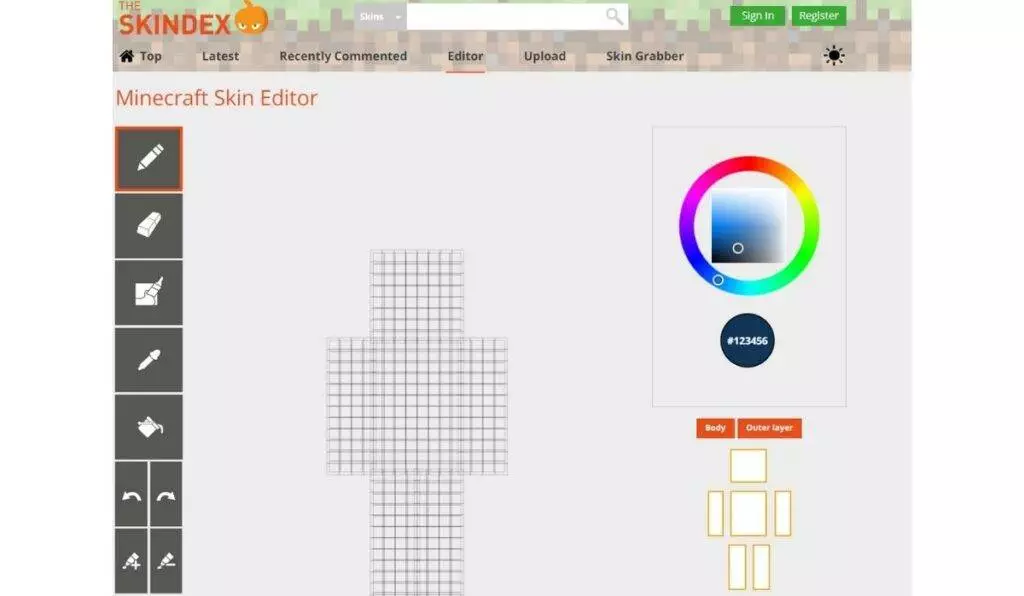
You can use the colour wheel to choose your desired colour and paint over the character model.
Step 3: Select the model type (Classic or Slim) after creating your skin and click the “Download” button
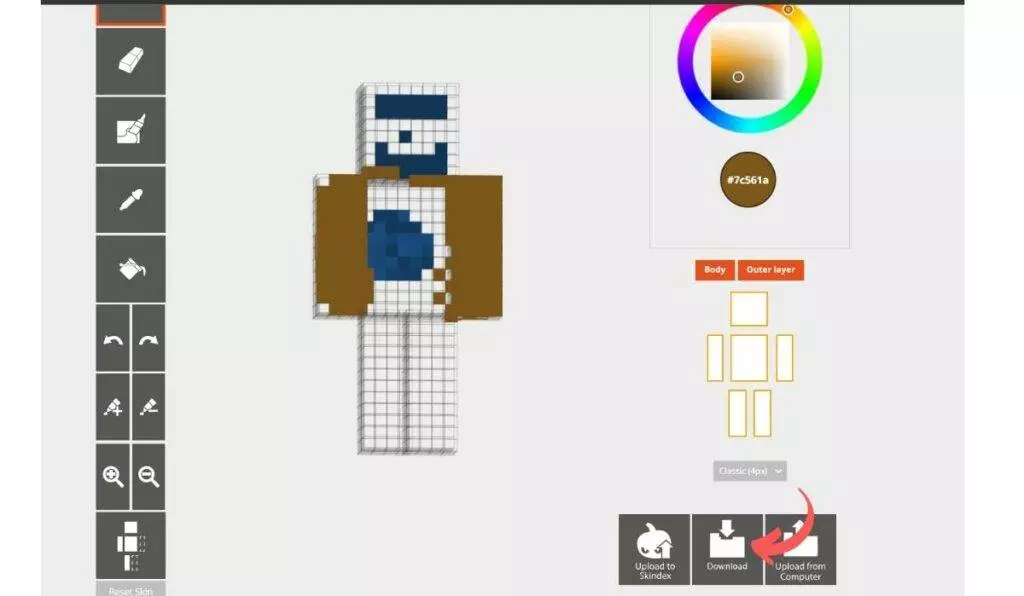
If you want to share your custom skin, then you can upload your skin to Skindex by clicking on the “Upload to Skindex.”
Step 4: Now, you can Load your self-made skin in the game and edit it further on Skindex or other photo editors.
Minecraft Skins Final Words
Anyone who wants to know how to download skins in Minecraft now has their questions answered. Remember to be safe while downloading skins and only use trusted sites like Minecraft Skindex. And be a responsible player by following Minecraft Skin codes and reporting anyone who violates them. Along with skins, Minecraft seeds are also a great customization feature, so if you want the best seeds, then you can check out some of the best Minecraft seeds in 2023.


